

Building Your First MCP Server: A Step-by-Step Tutorial


What if the biggest bottleneck in AI today isn't the intelligence of the model itself, but how poorly it connects to the local data, secure databases, and...
Building Your First MCP Server: A Step-by-Step Tutorial
What if the biggest bottleneck in AI today isn't the intelligence of the model itself, but how poorly it connects to the local data, secure databases, and internal APIs you use every single day? Despite modern LLMs boasting trillions of parameters and near-human reasoning, they remain functionally blind to your private workspace unless you resort to tedious copy-pasting or build brittle, custom API wrappers. If you want an AI assistant to analyze an internal database, check employee leave balances, or interact with a local filesystem, you have historically had to build a bespoke integration from scratch.
That is exactly why the industry has shifted rapidly toward a unified standard: the Model Context Protocol (MCP). Originally introduced by Anthropic and quickly adopted across the developer ecosystem, MCP acts as an open-source, standardized bridge between AI models (the "hosts") and your data sources (the "servers"). By decoupling the LLM from the integration layer, MCP allows you to build a tool once and expose it securely to any compatible AI assistant, from Claude Desktop and Cursor to advanced agentic frameworks.
Why MCP is the New Standard for Agentic AI
In today's development landscape, static chat prompts are giving way to autonomous agentic workflows. Industry data reveals that over 70% of enterprise AI initiatives are now focused on building agents capable of executing real-world actions rather than just generating text. To do this safely, these agents require secure, real-time context.
MCP solves this by establishing a clear, client-server architecture with three main players:
- The Host: The AI application (like Claude Desktop or Cursor) where the user interacts.
- The Client: The translation layer that maintains a secure connection to the server.
- The Server: Your custom application that exposes specific local or remote resources, prompts, and executable tools to the LLM.
This protocol ensures that your sensitive data remains on your infrastructure, and the LLM only receives the precise context it needs to fulfill a query. As businesses rush to deploy these hyper-connected, real-time workflows, communication platforms like CallMissed are already pioneering this space by allowing developers to orchestrate voice agents and WhatsApp bots that hook seamlessly into these standardized, multi-model backend data sources.
What You Will Learn in This Guide
If you have been looking for a practical, hands-on way to make your AI assistant smarter and more capable, you are in the right place. This comprehensive guide, Building Your First MCP Server: A Step-by-Step Tutorial, will demystify the entire process from absolute scratch.
In this tutorial, we will walk you through:
- Environment Setup: Preparing your local Python development environment with modern developer tools like
uvand FastMCP. - Basic Server Architecture: Initializing your first server and understanding how the Model Context Protocol handles requests.
- Creating Helper Functions: Writing the core business logic that your AI assistant will tap into.
- Implementing MCP Tools: Exposing these Python functions as secure, discoverable tools that the LLM can call on demand.
- Testing and Debugging: Using the official MCP Inspector to test your tools locally before deployment.
- Connecting to a Host: Integrating your brand-new MCP server with Claude Desktop or Cursor to see your AI agent execute real-world tasks in real time.
By the end of this guide, you won't just understand the theory behind the Model Context Protocol; you will have a fully functioning, custom MCP server running on your machine, ready to supercharge your AI workflows. Let's dive in and build it.
Introduction
The landscape of artificial intelligence is transitioning rapidly from passive chat interfaces to active, autonomous agents. While Large Language Models (LLMs) possess incredible reasoning capabilities, they suffer from a fundamental limitation: they are sandboxed. Out of the box, an LLM cannot access your local file system, query your internal database, fetch real-time weather data, or interact with your proprietary APIs.
Historically, developers solved this problem by writing custom, ad-hoc integration layers—often referred to as "tool calling" or "function calling" wrappers. However, as the ecosystem expanded, this approach became unsustainable. A tool built for one agent framework would not work on another, leading to fragmented codebases and wasted engineering hours.
To solve this challenge, the industry has embraced the Model Context Protocol (MCP). Originally introduced as an open standard, MCP acts as a universal adapter—a virtual "USB-C port" for AI models. It provides a secure, uniform protocol that enables AI applications to safely read data and trigger actions across any backend system.
This comprehensive, step-by-step tutorial is designed to take you from a complete beginner to deploying your very first operational MCP server. By the end of this guide, you will understand how MCP functions, how to build a server in Python using modern tools like FastMCP, and how to debug and run your server in real-world environments.
The Architecture of MCP: Three Core Players
To build an effective MCP server, you must first understand how data and commands flow through the protocol. MCP operates on a client-server architecture, but unlike traditional web development, there are three distinct actors involved in every conversation:
- The Host: This is the user-facing AI application that orchestrates the experience. Examples of hosts include Claude Desktop, Cursor, VS Code, or custom-built enterprise agent frameworks. The host decides when it needs external information or actions based on user input.
- The Client: This component lives inside (or right next to) the host. It establishes a secure, bidirectional protocol session with the server, translating the host's high-level intents into standardized MCP requests.
- The Server: This is the lightweight program you will be building. It is a specialized microservice that exposes three core primitives to the client: Tools (executable functions), Resources (read-only data sources), and Prompts (pre-configured templates).
When a user asks an AI assistant to "check my team's remaining leave balance," the Host realizes it lacks this data. It asks the Client to query the connected MCP Server. The Server executes a secure local database query, returns the structured data to the Client, and the Host uses that context to generate a natural, highly accurate response to the user.
Why Build an MCP Server?
Establishing a standardized protocol yields massive advantages for developers, startups, and enterprises alike:
- Write Once, Run Anywhere: Once you build an MCP server, you can plug it into any compatible AI application—whether that is your local IDE, a web-based chatbot, or an enterprise customer service agent.
- Separation of Concerns: Your core business logic remains isolated from the rapidly changing world of LLM APIs. The LLM does not need to know the inner workings of your database; it only needs to know the standard MCP schema you expose.
- Granular Security Controls: Because the MCP server runs locally or in a tightly controlled container, you decide exactly what data is read-only, what tools require manual user confirmation, and what actions are strictly off-limits.
For businesses scaling these capabilities to production, integrating custom-built MCP servers with robust communication pipelines is critical. For instance, CallMissed—an advanced AI communication infrastructure platform—enables developers to run seamless LLM inference across over 300+ models. By connecting custom MCP servers to CallMissed’s voice agents and multilingual WhatsApp chatbots (which natively support 22 Indian regional languages), organizations can inject real-time local database records directly into live phone calls or chat streams, creating hyper-personalized customer experiences without latency bottlenecks.
The Core Primitives of an MCP Server
When designing your first server, you will define how your application interacts with the LLM through three distinct communication channels:
- Tools (Actionable): These are executable functions that allow the LLM to perform actions in the physical or digital world. This could include writing a file to disk, sending an API call to a shipping provider, or updating a database record. Tools always return a response to the model to confirm execution.
- Resources (Informational): These are static or dynamic data points that the LLM can read. Think of resources as read-only files, database schemas, API documentation, or system logs. They provide raw context to the model to ground its reasoning.
- Prompts (Guiding): These are pre-designed templates and instructions that help the LLM structure its thoughts or execute specific workflows. For example, an HR-focused MCP server might expose a "summarize-leave-policy" prompt template to guide how the LLM explains company benefits.
What We Will Build and Project Prerequisites
In this guide, we will walk through the creation of a practical, real-world MCP server from scratch. We will design a server that acts as an HR Assistant, allowing an AI client to securely fetch employee profiles and execute leave-request updates.
To follow along with this tutorial, you will need the following prerequisites installed on your development machine:
- Python 3.10 or higher: The standard language environment for modern AI development.
- uv: A fast, modern Python package installer and resolver (highly recommended for managing MCP environments).
- An MCP-compatible Host: For testing, we recommend installing Claude Desktop or Cursor, which feature built-in developer options for loading local MCP servers.
- A Code Editor: Visual Studio Code, Cursor, or any IDE of your choice.
With our environment ready and the architectural concepts established, let’s dive into setting up our project directory and installing the required dependencies.
What is Model Context Protocol? (Architecture & Concepts)
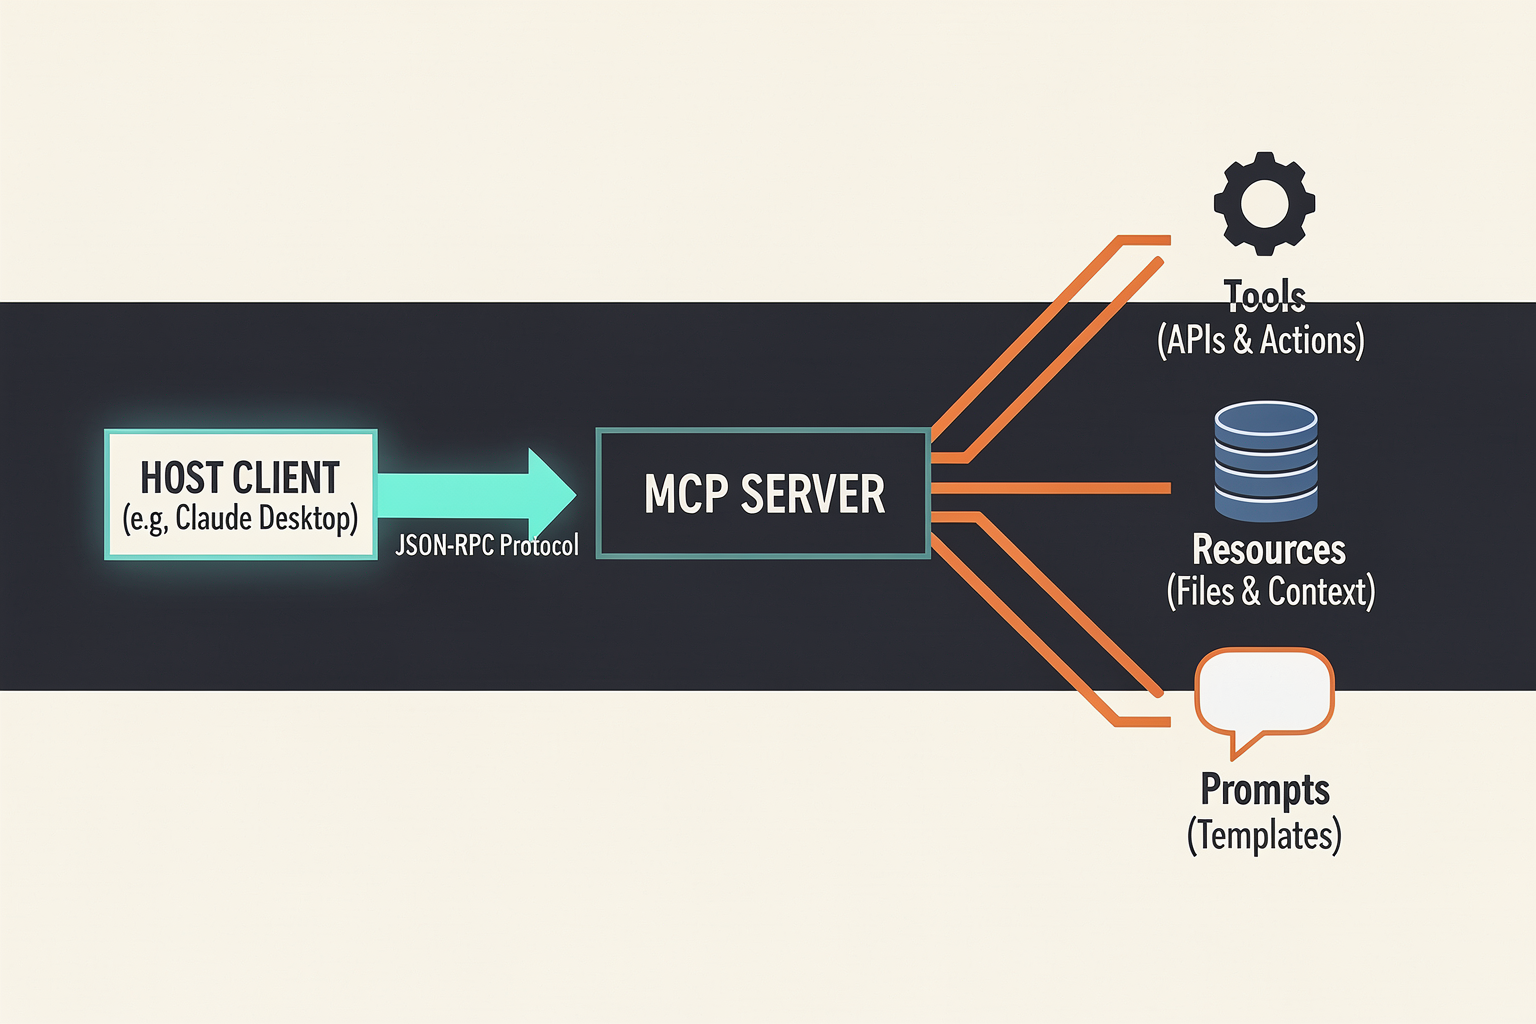
Before the emergence of modern integration standards, connecting Large Language Models (LLMs) to external files, databases, and APIs was a highly fragmented process. Developers had to write custom, ad-hoc integration code for every single AI agent or application they built. If you wanted your AI assistant to read a local database, fetch live weather data, and write a file, you had to write custom API wrappers, handle authentication manually, and hope the model understood the format of the output.
The Model Context Protocol (MCP) solves this "integration tax." Initially introduced to standardize how AI models securely access context-rich data and external tools, MCP functions as an open-standard, universal bridge. Think of it as the USB-C of the AI era: a single, standardized interface that allows any AI model to interact seamlessly with any data source or tool, regardless of where it lives or what language it was written in.
The MCP Architectural Triad
To understand how MCP functions, it helps to look at its architecture. An MCP connection always involves three core actors working in tandem:
- The Host: This is the primary AI application or runtime environment that orchestrates the user session. Examples of hosts include Claude Desktop, Cursor, or enterprise-grade communication platforms. The host is responsible for managing user interactions, prompting the AI model, and deciding when to request external data or actions.
- The Client: Operating inside the host, the MCP Client is the component that maintains a direct, secure connection with the MCP Server. The client's job is to negotiate capabilities, translate model requests into standardized protocol calls, and securely transmit data back and forth.
- The Server: This is a lightweight, specialized program that runs locally on your machine or remotely in the cloud. The server exposes specific resources, tools, or prompts to the client. Crucially, the server acts as a gatekeeper: it only reveals the specific data or commands you explicitly authorize, ensuring your local files, databases, or proprietary APIs remain secure.
For businesses deploying production-ready AI infrastructure, this architecture is incredibly powerful. For example, platforms like CallMissed—which enable developers to run LLM inference across more than 300 models and orchestrate advanced voice agents—can leverage MCP-based patterns to connect conversational voice agents directly to internal corporate databases, billing systems, or local custom APIs without requiring brittle, custom-coded middleware.
The Three Pillars of MCP Capabilities
Every MCP server is built around three core capabilities. When writing your first server, you will define how your application handles one or more of these pillars:
- Resources (Read-Only Data): Resources are akin to read-only endpoints in a standard REST API. They allow your MCP server to expose raw data or context to the AI model. Resources are identified by a unique URI (Uniform Resource Identifier) scheme, such as
file://orpostgres://. For instance, a resource could expose a database schema, log files, or live system monitoring data, giving the LLM the exact context it needs to answer user queries accurately. - Tools (Executable Actions): Tools represent active, executable capabilities. If resources let the LLM "read," tools let the LLM "write" or "do." When an LLM determines it needs to take an action—such as executing a database query, sending a Slack message, or running a code script—it issues a call to a specific tool. The MCP server runs this action locally or remotely and returns the result to the client. Because tools can modify state or perform secure operations, they usually require user confirmation before execution.
- Prompts (Dynamic Templates): Prompts are pre-packaged templates that help guide the user's interaction with the LLM. They allow servers to expose recommended workflows, slash commands, or structured system prompts. For example, a development-focused MCP server might offer a prompt template for "Code Review" or "Refactor Bug," pre-configuring the model's persona and context for that specific task.
Communication Transports: How Clients and Servers Talk
To accommodate different security parameters and deployment environments, the Model Context Protocol supports two primary transport protocols:
- STDIO (Standard Input/Output): This is the most common transport layer for local development and desktop integrations. Under this mechanism, the host launches the MCP server as a sub-process. Communication occurs instantly through standard input (
stdin) and standard output (stdout) streams. Because STDIO requires no open network ports or complex firewalls, it is highly secure and ideal for local developer tools, IDE extensions, or desktop clients. - SSE (Server-Sent Events): For cloud-native environments and remote server deployments, MCP utilizes Server-Sent Events (SSE) over HTTP. In this setup, the client initiates an HTTP connection to a remotely hosted MCP server. The server keeps this connection open to stream data back to the client, while the client sends commands back via standard HTTP POST requests.
By separating the transport layer from the protocol logic, MCP makes it incredibly easy to scale. You can build and test an MCP server locally on your machine using STDIO, and then deploy that exact same code to a cloud environment using SSE when you are ready to put it into production. This level of flexibility is precisely why developers and enterprises are rapidly adopting the standard to orchestrate complex tool-use workflows for their AI agents.
Prerequisites & Setup (TABLE)
Before writing a single line of code for your Model Context Protocol (MCP) server, establishing a clean, robust development environment is essential. Because MCP functions as an open standard protocol that connects AI models (the Hosts, such as Claude Desktop, Cursor, or specialized agent frameworks) with external data sources and tools (the Servers), your local environment must be capable of managing secure, bidirectional communication over standard input/output (stdio) or SSE (Server-Sent Events).
Setting up your environment correctly from the beginning prevents difficult-to-debug connectivity issues between your local server and the AI host. Whether you choose to build your server using Python (often utilizing Anthropic's FastMCP framework) or TypeScript/Node.js, you will need a specific set of tools, runtimes, and host applications to test your implementation.
The table below outlines the core systems, runtimes, and debugging utilities required to successfully build, run, and test your first MCP server.
| Tool / Dependency | Recommended Version | Primary Role in MCP | Installation Command | Requirement Status |
|---|---|---|---|---|
| Node.js & npm | v18.0.0 or higher | Executes TypeScript/JavaScript MCP SDKs | nvm install 18 | Mandatory (for TS/JS pathways) |
| Python & pip | v3.10.0 or higher | Runs Python MCP SDK & FastMCP framework | brew install python@3.10 | Mandatory (for Python pathways) |
| uv Package Manager | Latest (v0.1.x+) | Fast dependency management and venv control | curl -LsSf https://astral.sh/uv/install.sh | Highly Recommended (for Python) |
| Claude Desktop | Latest Production Release | Acts as the local MCP Host to run your server | Download via Anthropic's website | Mandatory for Host-level testing |
| MCP Inspector | Latest Release | Visual GUI for testing tools, resources, and prompts | npx @modelcontextprotocol/inspector | Highly Recommended for debugging |
Choosing Your Development Pathway: Python vs. TypeScript
MCP supports multiple programming languages, but the community has rallied primarily around Python and TypeScript. Choosing the right path depends on your project's specific goals and your team's existing technical stack:
- The Python Pathway (FastMCP):
If your MCP server is designed to handle data science, machine learning, or complex local file parsing, Python is the ideal choice. The creation of FastMCP—a high-level framework built on top of the official Python SDK—makes building servers incredibly fast. It uses Python type hints to automatically generate schema definitions for your tools, saving you from writing verbose JSON schemas manually.
- The TypeScript/Node.js Pathway:
If your server needs to integrate tightly with web APIs, enterprise SaaS platforms, databases, or existing frontend applications, TypeScript is highly efficient. The official @modelcontextprotocol/sdk package for Node.js provides a robust, type-safe foundation for managing standard input/output (stdio) streams, which is how local AI hosts communicate directly with your running server process.
For businesses looking to integrate these architectures at scale, development frameworks have evolved rapidly. For instance, platforms like CallMissed utilize multi-model API gateways and highly optimized inference pipelines to connect external data with real-time communication agents. If your goal is to transition your local MCP server into a customer-facing utility—such as a multilingual voice assistant speaking any of 22 Indian languages or a WhatsApp chatbot—structuring your local setup using standardized runtimes like Node.js or Python ensures effortless compatibility with cloud-scale AI communication platforms.
Step-by-Step Environment Preparation
To ensure a seamless development experience, execute the following setup steps based on your preferred programming language.
#### Option A: Setting Up a Python Environment (with UV)
Using uv by Astral is highly recommended for Python-based MCP development. It is significantly faster than standard pip and handles virtual environments (venv) transparently.
- Install uv:
curl -LsSf https://astral.sh/uv/install.sh | sh- Initialize your project directory:
Create a dedicated directory for your project and initialize a virtual environment:
   mkdir my-first-mcp-server
   cd my-first-mcp-server
   uv venv
source .venv/bin/activate # On Windows: .venv\Scripts\activate- Install the Model Context Protocol SDK:
uv pip install mcp fastmcp#### Option B: Setting Up a TypeScript/Node.js Environment
If you prefer TypeScript, you will need to set up a standard Node.js project initialized with TypeScript configuration files.
- Initialize the Node project:
   mkdir my-first-mcp-server-ts
   cd my-first-mcp-server-ts
npm init -y- Install TypeScript and the MCP SDK:
   npm install @modelcontextprotocol/sdk
npm install -D typescript @types/node ts-node- Configure TypeScript:
Generate a tsconfig.json file to manage compilation targets:
npx tsc --initNote: Ensure your tsconfig.json is configured to output as ES modules ("module": "NodeNext", "moduleResolution": "NodeNext") to support modern import statements used by the SDK.
Installing and Configuring the MCP Host
An MCP server cannot run in a vacuum; it requires an MCP Host to send queries, parse tool definitions, and act as the user-facing interface. For this tutorial, we will use Claude Desktop as our primary local host.
- Download and install Claude Desktop for your respective operating system (macOS or Windows).
- Locate the configuration directory for Claude Desktop. This is where you will register your local MCP server so the LLM knows how to launch it:
- macOS:
~/Library/Application Support/Claude/claude_desktop_config.json - Windows:
%APPDATA%\Claude\claude_desktop_config.json - If this file does not exist, create it. A basic structure looks like this:
   {
     "mcpServers": {
       "my-test-server": {
         "command": "uv",
         "args": [
           "run",
           "--with",
           "mcp",
           "path/to/your/server.py"
         ]
       }
     }
   }
With your runtimes active, libraries installed, and host configuration targeted, your development environment is fully prepared. In the next section, we will begin writing the actual code to boot up your basic MCP server and register its first utility.
Getting Started: Choosing Your Framework
Before writing a single line of code for your Model Context Protocol (MCP) server, you need to make a fundamental architectural decision: choosing the right development framework. MCP is an open standard, meaning it is language-agnostic. However, the developer community and Anthropic have established two primary ecosystems that dominate MCP development: Python and TypeScript (Node.js).
Selecting the right framework depends on your existing tech stack, the APIs you plan to integrate, and how you intend to deploy your server. Whether you are building an MCP server to query a local database, interface with proprietary hardware, or manage real-time communication pipelines, your choice of SDK will dictate your development velocity and code maintainability.
The Python Ecosystem: FastMCP and the Python SDK
For most developers—especially those focused on AI, machine learning, data science, or automation—Python is the natural starting point. The Python ecosystem for MCP has evolved rapidly, moving from low-level protocol implementations to high-level, developer-friendly frameworks.
- FastMCP: Created to simplify MCP development, FastMCP is to MCP what FastAPI is to web development. It abstracts away the complex JSON-RPC 2.0 transport layers and protocol handshake details under a clean, decorator-based interface.
- How it works: Instead of manually defining schemas, you use Python decorators like
@app.tool()or@app.resource(). FastMCP automatically inspects your Python function signatures, docstrings, and type hints to generate the exact JSON schemas that LLMs need to understand your tools. - Best for: Rapid prototyping, developers who want a "batteries-included" experience, and those integrating AI models with Python-heavy libraries like Pandas, NumPy, or LangChain.
- Official Python SDK (
mcp): If you require deep, granular control over transport protocols (such as customizing Server-Sent Events or stdio streams) or need to implement highly non-standard behavior, the core Python SDK is your tool. It requires more boilerplate but offers unmatched flexibility.
If your goal is to build intelligent agents that handle real-world operations—such as an automated customer agent that triggers workflows or processes natural language queries across databases—Python’s extensive library ecosystem is incredibly powerful. For instance, when orchestrating complex voice agents, developers often use Python MCP servers in tandem with communication infrastructures. Platforms like CallMissed enable you to connect your custom Python MCP servers directly to voice agent pipelines, allowing an AI to query your server's tools while speaking to a customer in real time.
The TypeScript/Node.js Ecosystem: High-Performance Web Standards
If you come from a web development background, or if your MCP server needs to run in a serverless, lightweight environment, the TypeScript/Node.js ecosystem is an outstanding choice.
The official @modelcontextprotocol/sdk is written in TypeScript, ensuring first-class support for type safety and modern asynchronous workflows.
- Type Safety out of the Box: TypeScript forces you to define strict interfaces for your inputs and outputs. This prevents runtime errors when an LLM attempts to pass malformed arguments to your server tools.
- Asynchronous Performance: Node.js’s event-driven, non-blocking I/O model is perfect for MCP servers that spend most of their time waiting for external web APIs, databases, or third-party services to respond.
- Serverless Deployment: TypeScript/JavaScript MCP servers can easily be bundled and deployed to edge networks or serverless environments (like Cloudflare Workers or AWS Lambda) using standard tools like Vite, Esbuild, or Bun.
Choose TypeScript if you are already comfortable with the Node.js ecosystem, require seamless integration with frontend frameworks, or are building an MCP server that heavily relies on high-concurrency web APIs.
Comparing the Options: Which is Right for You?
To help you decide, let's look at how Python (specifically FastMCP) and TypeScript compare across several critical developer metrics:
- Developer Velocity: FastMCP wins here for beginners. You can spin up a fully functional server with tools and resources in under 20 lines of code. TypeScript requires slightly more boilerplate to set up the server instance and register tools manually.
- Ecosystem and Libraries: Python dominates if your server needs to interact with data science tools, localized LLMs, or complex file parsers. TypeScript wins if you are building web scrapers, interfacing with modern SaaS APIs, or deploying to edge-runtime hosting environments.
- LLM Compatibility: Both SDKs are fully compliant with the MCP specification, meaning any server you build will work seamlessly with hosts like Claude Desktop, Cursor, or customized agent orchestration platforms.
When designing conversational workflows or building interactive voice response (IVR) systems, keeping your latency low is paramount. For example, if you are leveraging CallMissed’s Speech-to-Text and LLM gateway APIs to build a multilingual voice assistant, a TypeScript MCP server running on a low-latency edge network can fetch database records in milliseconds, keeping the conversational delay imperceptible to the user.
Setting Up Your Environment
Once you’ve made your framework choice, you need to prepare your development environment. Regardless of your language, you will need a couple of essential tools installed.
For Python/FastMCP developers, we highly recommend using uv, an extremely fast Python package installer and resolver written in Rust. It simplifies dependency management significantly compared to traditional pip and venv setups.
- Install uv on your system.
- Initialize your project directory using
uv init. - Install the FastMCP library using
uv add fastmcp.
For TypeScript developers, you will need Node.js (version 18 or higher recommended) and your package manager of choice (npm, yarn, or pnpm).
- Initialize a new Node project with
npm init -y. - Install TypeScript and the MCP SDK using
npm install typescript @modelcontextprotocol/sdk. - Set up your
tsconfig.jsonto configure target outputs and module resolution.
With your framework selected and your environment ready, you are prepared to write the actual server code. In the next section, we will walk through the step-by-step process of initializing your project files and writing your very first basic MCP server.
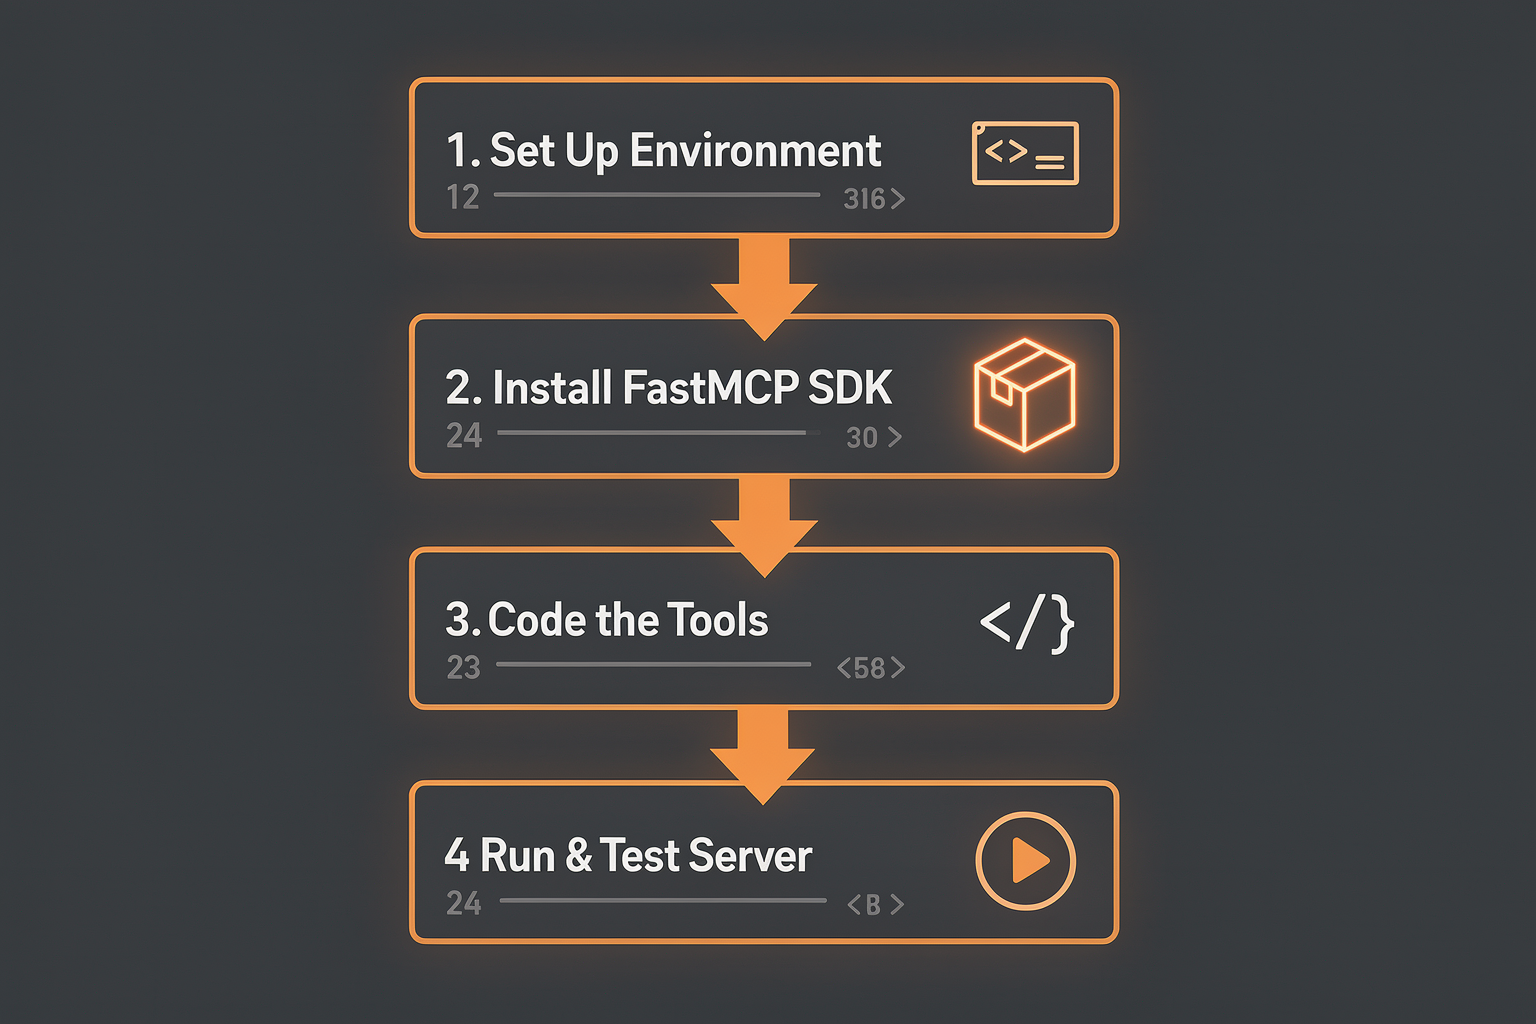
Step-by-Step Walkthrough: Building Your Server with FastMCP
Why FastMCP?
Anthropic introduced FastMCP as a high-level Python framework designed to streamline the creation of Model Context Protocol (MCP) servers. Before FastMCP, developers had to write significant boilerplate to register schemas, handle JSON-RPC 2.0 messages, and manage asynchronous communication protocols.
FastMCP leverages Python's type hints and docstrings to automatically generate the tool definitions and parameters that LLMs require. Instead of manually writing complex JSON schemas, a single decorator like @mcp.tool() tells the framework how to parse, package, and expose your function.
Step 1: Project Initialization & Environment Setup
To keep dependencies isolated and build a production-ready server, we will use uv, the ultra-fast Python package installer and resolver.
First, open your terminal and create a dedicated project directory:
mkdir my-first-mcp-server
cd my-first-mcp-server
Next, initialize a virtual environment and activate it:
# Initialize the virtual environment using uv
uv venv

# Activate the environment
# On macOS/Linux:
source .venv/bin/activate
# On Windows:
.venv\Scripts\activate
Step 2: Installing Dependencies
With your virtual environment active, install fastmcp and any required HTTP or utility libraries. For this guide, we will also install requests to simulate fetching external data:
uv pip install fastmcp requestsThis installs both the core FastMCP SDK and its command-line interfaces, allowing you to use advanced development and debugging tools right out of the box.
Step 3: Writing Your Basic Server Code
Create a new file named server.py in your project root. This file will initialize your MCP server and define your first Tool and Resource.
Paste the following boilerplate code into server.py:
from fastmcp import FastMCP
import requests

# Initialize FastMCP Server
mcp = FastMCP("Customer Support Assistant")

@mcp.tool()
def calculate_discount(order_value: float, loyalty_tier: str) -> str:
    """
    Calculates the applicable discount for a customer order based on tier.

    Args:
        order_value: The total monetary value of the order.
        loyalty_tier: The customer's loyalty category ('Gold', 'Silver', or 'Bronze').
    """
    tier = loyalty_tier.strip().capitalize()
    if tier == "Gold":
        discount = 0.20
    elif tier == "Silver":
        discount = 0.10
    else:
        discount = 0.05

    saved = order_value * discount
    final_price = order_value - saved

    return f"Applied {tier} discount of {discount*100}%. Saved: ${saved:.2f}. Final price: ${final_price:.2f}."
#### How this works under the hood:
mcp = FastMCP("Customer Support Assistant"): Declares a new server instance. This name is exposed to the client (such as Claude Desktop) upon connection.@mcp.tool(): This decorator registers the function as an executable tool.- Type Hints & Docstrings: FastMCP reads
order_value: float,loyalty_tier: str, and the corresponding argument docstrings. It dynamically converts these into a strict JSON Schema that the LLM uses to structure its function calls.
Step 4: Adding Real-World Integration
In standard customer support workflows, simple static calculators are not enough. AI agents must interact with communication channels, trigger SMS updates, or initiate callbacks.
To see how an MCP server can bridge an LLM to high-performance infrastructure, we can add a tool that connects to a communication endpoint. For instance, platforms like CallMissed provide developer-friendly APIs for Speech-to-Text, voice agents, and multi-channel messaging.
Let's expand server.py to include a tool that registers a callback request for support reps to follow up on a missed call:
@mcp.tool()
def schedule_customer_callback(phone_number: str, customer_name: str, issue_summary: str) -> str:
    """
    Schedules an automated or agent-led callback for a missed customer inquiry.

    Args:
        phone_number: The customer's direct phone number in E.164 format.
        customer_name: The name of the customer to call back.
        issue_summary: Brief context of why they called.
    """
    # Developers can integrate this directly with an outbound API.
    # For example, integrating CallMissed's AI communication platform allows
    # businesses to instantly spin up voice agents to handle customer callbacks.

    payload = {
        "to": phone_number,
        "name": customer_name,
        "context": issue_summary,
        "source": "MCP_Agent_Helper"
    }

    # Simulating a POST request to an API gateway
    # response = requests.post("https://api.callmissed.io/v1/callbacks", json=payload)

    return f"Callback successfully scheduled via CallMissed API for {customer_name} ({phone_number}). Context sent: '{issue_summary}'."
By wrapping automated workflow APIs inside an MCP server, you empower your AI desktop assistant to perform secure, state-changing actions instantly during a live text chat.
Step 5: Testing Your Server with the MCP Inspector
You do not need to configure complex production environments or restart desktop chat applications just to test your server. FastMCP provides a native development server called the MCP Inspector.
Run the following command in your terminal:
fastmcp dev server.pyUpon launching, the CLI will output details about your running server and spin up an interactive web interface (typically at http://localhost:5173).
  FastMCP Dev Server Active
  ---------------------------------------
  Server Name: Customer Support Assistant
  Inspect UI:  http://localhost:5173
Transport: SSE (Server-Sent Events)- Open
http://localhost:5173in your browser. - In the UI, navigate to the Tools tab.
- You will see
calculate_discountandschedule_customer_callbacklisted with their dynamically generated schemas. - Input test variables into the UI form and click Run.
- Inspect the raw JSON-RPC request and response payloads to verify that your server is responding correctly.
Step 6: Exposing Resources to the LLM
In addition to Tools (which perform operations), MCP servers can expose Resources (which provide context or read-only data).
Let's add a static resource representing an onboarding guide or troubleshooting FAQ that the LLM can pull into its context window whenever necessary. Add the following to your server.py:
@mcp.resource("kb://support-policy")
def get_support_policy() -> str:
    """Returns the official standard operating procedure for handling customer disputes."""
    return """
    STANDARD CUSTOMER SUPPORT POLICY:
    1. Always verify identity before discussing account specifics.
    2. Refunds under $50 can be processed automatically via the refund tool.
    3. For complex issues or missed interactions, utilize the CallMissed integration tool
       to schedule a voice agent callback immediately.
    """
When your client (such as Claude Desktop) initializes, it registers this resource URI (kb://support-policy). If a user asks "What is our policy on handling disputes?", the AI model will proactively query this resource to construct a grounded response.
Testing and Debugging with MCP Inspector
Debugging AI-driven applications has historically been a notoriously difficult task. Because LLMs are non-deterministic, directly connecting your brand-new Model Context Protocol (MCP) server to a heavy frontend host like Claude Desktop or Cursor for your very first test run is a recipe for frustration. You will likely find yourself digging through buried application log files just to discover why a simple tool failed to execute.
To solve this, the developer community relies on the MCP Inspector. The MCP Inspector is an interactive, web-based developer tool designed specifically to isolate, test, and debug MCP servers. It functions as a lightweight, local MCP host, allowing you to bypass complex LLM clients entirely and interact directly with your server's tools, resources, and prompts via an intuitive browser interface.
Why Use the MCP Inspector?
Before diving into the execution steps, it is essential to understand why this tool is indispensable for your development workflow:
- Environment Isolation: It eliminates the unpredictability of the LLM. You can verify that your server’s logic, arguments, and schemas are correct before letting an AI model try to call them.
- Real-time Protocol Monitoring: The inspector exposes the underlying JSON-RPC 2.0 messages passing back and forth. You can see the exact JSON payload sent by the host and the structured response returned by your server.
- Rapid Iteration: Modern implementations of the inspector (especially when paired with frameworks like FastMCP) support hot-reloading. When you modify your server code, the inspector automatically updates without requiring a manual restart.
Launching the Inspector
Depending on whether you built your MCP server using Python or TypeScript, launching the inspector is a straightforward process.
#### Method A: For Python (FastMCP)
If you built your server using Python's modern FastMCP framework, the development inspector is built right into your environment. You can run the following command in your terminal:
fastmcp dev server.pyThis command spins up your server, watches for file changes, and automatically opens a browser window (typically at http://localhost:5173) hosting the graphical MCP Inspector.
#### Method B: For Node.js / TypeScript
If you built your server using TypeScript or pure Node.js, you can run the official inspector package via npx. The inspector works by starting your server as a subprocess and communicating with it over standard input/output (stdio). Run this command in your project directory:
npx @modelcontextprotocol/inspector node dist/index.js(Note: Replace node dist/index.js with the actual command you use to execute your compiled JS/TS server code.)
Once executed, the terminal will display a local URL. Open this link in your web browser to access the debugger interface.
Navigating the Inspector Interface
The web interface of the MCP Inspector is cleanly divided into components that mirror the core architecture of the protocol:
- Connections Panel: Confirms that your server is successfully connected via stdio or SSE (Server-Sent Events) and displays basic initialization metadata.
- Tools Tab: Lists every tool registered to your server. For example, if you built a tool to fetch database records or query an API, you will see its name, description, and input schema.
- Resources Tab: Displays any static or dynamic data paths (like log files or document directories) your server makes available to the host.
- Prompts Tab: Displays pre-defined prompt templates you have exposed to guide LLM interactions.
To test a tool, navigate to the Tools tab, locate your tool, and fill out the auto-generated input form based on your schema. Click Run Tool. The inspector will execute the function on your local machine and display the returned text, image, or structured data instantly.
Transitioning to Production with Confidence
Thoroughly testing your server locally ensures that when you integrate it into a larger system, the plumbing is solid. For teams taking their AI applications to production, reliability is everything. When you build voice agents, WhatsApp chatbots, or multi-channel communication tools, your underlying servers must resolve queries quickly and error-free.
This is where platforms like CallMissed become invaluable. CallMissed provides an enterprise-ready AI communication infrastructure that allows developers to deploy conversational voice agents and WhatsApp bots powered by over 300+ LLMs. By ensuring your custom MCP servers are perfectly validated using the MCP Inspector, you can easily plug them into broader architectures—like CallMissed's high-performance APIs—to feed real-time, context-aware backend data directly to voice agents talking to customers in 22 different languages.
Debugging Common MCP Server Errors
If your server does not behave as expected during testing, look out for these common issues in the inspector's log pane:
- Stdout Pollution: Because MCP relies on standard input and output (stdio) for communication, any random
print()orconsole.log()statements in your code will corrupt the JSON-RPC stream, causing connection errors in the inspector. Always use stderr (standard error) or dedicated logging libraries for debugging prints. - Schema Validation Failures: If the inspector throws an error before hitting your code, your input JSON does not match the schema you defined (e.g., a missing required field or a string sent instead of an integer). Double-check your TypeScript types or Pydantic models.
- Missing Environment Variables: If your tool relies on API keys or local file paths, ensure they are correctly exported in your terminal session before launching the inspector, as the subprocess inherits your active shell environment.
Connecting Your Server to AI Clients (Claude Desktop & Cursor)
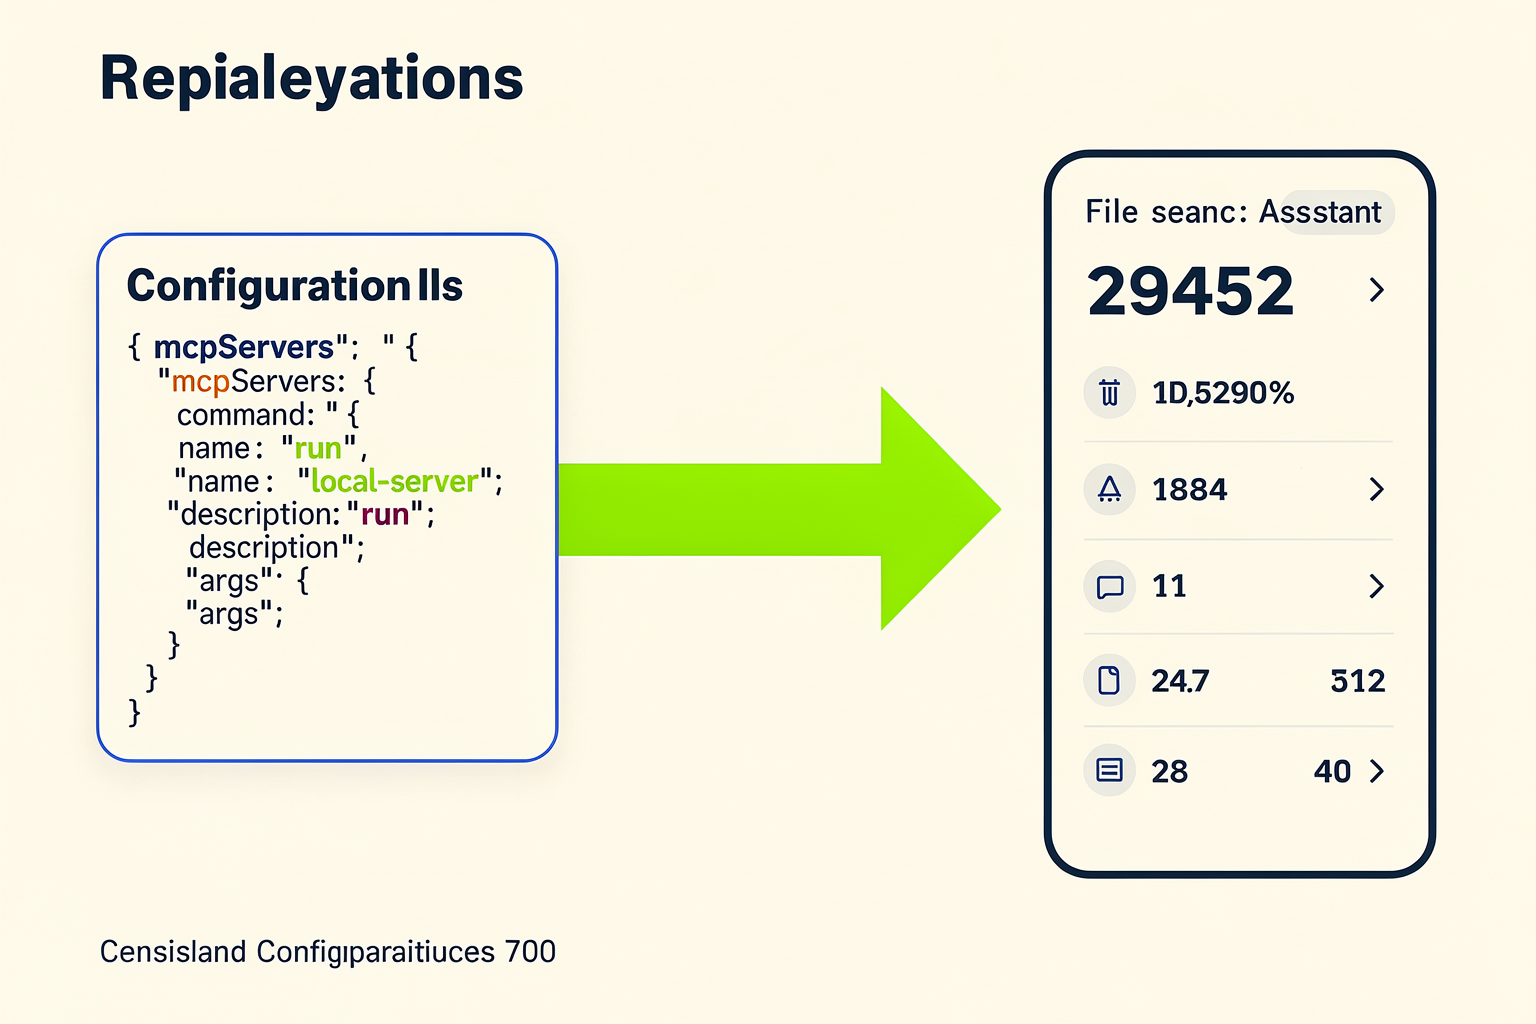
Now that you have built your Model Context Protocol (MCP) server, the next step is connecting it to an AI client. In the MCP ecosystem, the AI client is referred to as the Host. The host is responsible for orchestrating user interactions, managing conversation history, and calling tools or resources exposed by your MCP server.
Two of the most popular and powerful AI clients supporting MCP natively are Claude Desktop and Cursor. Connecting your server to these platforms allows AI assistants to run your custom code, access your databases, and interact with your APIs in real time.
Understanding the Host-Server Connection
Local MCP servers communicate with hosts using Standard Input/Output (stdio) as the transport layer. Instead of running a persistent web server with HTTP endpoints, the host launches your server script as a subprocess and writes JSON-RPC 2.0 messages directly to its standard input (stdin), reading responses from its standard output (stdout).
Because communication relies entirely on stdout, a critical rule of thumb when developing MCP servers is to never use standard print statements (print() in Python or console.log() in Node.js) for debugging. Doing so will corrupt the JSON-RPC stream and break the connection. Instead, always route debug messages through standard error (sys.stderr or console.error), which the host will capture and log.
Step 1: Connecting to Claude Desktop
Claude Desktop provides a robust environment to test and run custom MCP servers. To link your server to Claude, you must edit its global configuration file.
#### 1. Locate the Claude Configuration File
Depending on your operating system, navigate to the following directory to find or create the claude_desktop_config.json file:
- macOS:
~/Library/Application Support/Claude/claude_desktop_config.json - Windows:
%APPDATA%\Claude\claude_desktop_config.json
#### 2. Configure Your Server
Open the JSON configuration file in your text editor. You need to define your server under the mcpServers key. Here is how to configure it depending on how you packaged your server:
For Python (using FastMCP and uv):
{
  "mcpServers": {
    "my-first-mcp-server": {
      "command": "uv",
      "args": [
        "run",
        "--with",
        "mcp",
        "/absolute/path/to/your/server.py"
      ]
    }
  }
}
For Node.js / TypeScript:
{
  "mcpServers": {
    "my-first-mcp-server": {
      "command": "node",
      "args": [
        "/absolute/path/to/your/build/index.js"
      ]
    }
  }
}
Note: Always use absolute paths for both execution tools and script files, as Claude Desktop runs in its own environment context and will not resolve relative paths.
#### 3. Test the Connection in Claude Desktop
- Completely close and restart Claude Desktop.
- Open a new chat window.
- Look for the Plug or Hammer icon in the bottom-right corner of the input box.
- Click the icon to view active MCP servers. If your configuration is correct, you should see
my-first-mcp-serverlisted alongside the custom tools you defined. - Ask Claude to perform a task requiring your tool (e.g., "Check the leave balance for Employee ID 402"). Claude will call your local server, execute the Python/TypeScript logic, and return the answer.
Step 2: Connecting to Cursor
Cursor is an AI-powered code editor that natively integrates MCP servers to assist with code generation, file system analysis, and API interactions.
Unlike Claude Desktop, which requires manual editing of a JSON configuration file, Cursor offers a clean graphical user interface (GUI) to manage your MCP servers.
#### 1. Navigate to MCP Settings
- Open Cursor.
- Go to the editor settings by clicking the gear icon in the top right corner (or press
Cmd + ,on macOS /Ctrl + ,on Windows). - In the sidebar, navigate to Features and scroll down to the MCP section.
#### 2. Add Your MCP Server
- Click the + Add New MCP Server button.
- Fill out the configuration modal with the following details:
- Name: Give your server a recognizable name (e.g.,
LocalDatabaseHelper). - Type: Select command (this indicates a local stdio connection).
- Command: Input the execution command, ensuring you use absolute paths. For example:
uv run --with mcp /absolute/path/to/your/server.py- Click Save.
#### 3. Verify and Execute
Once saved, Cursor will immediately attempt to initialize the connection.
- A green status indicator next to the server name means the connection was successful, and Cursor has parsed your tools.
- A red status indicator indicates an initialization failure.
Once connected, you can open Cursor Chat (Cmd + L or Ctrl + L) or use Cursor Composer (Cmd + I), and prompt the AI to use your tool: "Use my LocalDatabaseHelper to list the active schema." Cursor will automatically route the request through your local server.
Scaling Beyond the Local Desktop
While testing MCP servers locally in Claude Desktop or Cursor is ideal for personal development and debugging, businesses often need to scale these capabilities. Running tools locally on a developer's laptop does not work when you need to power production systems.
For teams looking to deploy custom tools and LLM integrations to customer-facing channels, platforms like CallMissed bridge the gap. By integrating with CallMissed's production-ready infrastructure, you can easily transition local AI logic into public-facing voice agents and WhatsApp chatbots. CallMissed provides access to a multi-model API gateway supporting over 300+ LLMs, allowing you to run your backend tool execution workflows seamlessly across diverse communication interfaces.
Troubleshooting Connection Errors
If your host client fails to connect to your MCP server, check the following common issues:
- Relative Paths: Ensure all paths in your JSON configurations or GUI commands are absolute. Neither Claude Desktop nor Cursor knows your current working directory.
- Environment Variables: If your server relies on external API keys or configuration variables, they must be explicitly passed. In Claude's JSON config, you can add an
"env"object:
    "env": {
      "DATABASE_URL": "postgresql://user:pass@localhost:5432/db",
      "API_KEY": "your_api_key_here"
}- Stdio Pollution: Ensure you do not have accidental
print()orconsole.log()statements executing during server startup. Even a simpleprint("Server started!")will break the JSON-RPC handshake. - Dependency Issues: Verify that the environment running your script has all dependencies installed. If you are using Python, running through
uv runhandles dependency resolution automatically, making it the most reliable method for local execution.
Advanced Tips & Tricks (TABLE)
Once your basic Model Context Protocol (MCP) server is up and running, transitioning it from a local hobby project into a robust, production-grade integration requires a shift in how you handle performance, testing, and security. Because MCP servers act as a direct bridge between LLMs (hosts like Claude Desktop or Cursor) and your underlying databases or APIs, minor latency issues or unhandled exceptions can quickly derail user sessions.
The following strategies, optimizations, and testing methodologies will help you build reliable, highly responsive, and secure MCP implementations.
Key Optimization and Debugging Strategies
When scaling your MCP server, planning for edge cases is critical. Use this reference table to implement advanced optimization strategies across different stages of your server's lifecycle:
| Optimization Strategy | Target Problem | Implementation Best Practice | Complexity |
|---|---|---|---|
| Local CLI Testing | Slow feedback loop when debugging code changes in host GUIs | Use the official MCP Inspector (npx @modelcontextprotocol/inspector) to debug JSON-RPC payloads | Low |
| Input Schema Validation | Hallucinated or malicious LLM arguments causing runtime exceptions | Enforce strict JSON Schema validation using Pydantic (Python) or Zod (TypeScript) | Medium |
| Transport Security | Eavesdropping or unauthorized access in remote deployments | Use stdio for local environments; enforce HTTPS/WSS with API keys for remote deployments | High |
| Response Caching | High LLM token costs and latency on repetitive read operations | Implement memory-based or Redis caching for heavy tool reads with a short TTL | Medium |
| Asynchronous I/O | Blocking execution loops degrading LLM responsiveness | Leverage asyncio (Python) or native async/await (Node.js) for all network and database operations | Medium |
Mastering the MCP Inspector and Debugging Workflows
Debugging an MCP server within a desktop application like Claude Desktop can be frustrating. Because communication occurs silently over standard input/output (stdio), errors often manifest simply as the LLM stating it "cannot access the tool."
To isolate your server and debug in a controlled environment, use the MCP Inspector. It provides an interactive web interface where you can view registered tools, inspect schemas, and trigger tool calls manually.
- Launch the Inspector: Run the following command in your terminal, replacing the command with the path to your server:
npx @modelcontextprotocol/inspector uv run my_mcp_server.py- Review JSON-RPC Traffic: The Inspector displays the raw JSON-RPC 2.0 frames sent between the client and server. Watch for
method: "tools/call"payloads to ensure your server parses arguments precisely as expected. - Capture Logs: Redirect your internal application logs to standard error (
sys.stderrorconsole.error) rather than standard out (stdout). Because MCP usesstdoutfor protocol communication, printing raw logs tostdoutwill corrupt the transport stream and crash the connection.
Input Sanitization & Robust Error Handling
LLMs are highly collaborative but notoriously unpredictable clients. They will occasionally generate dates in the wrong format, omit required parameters, or pass hallucinated arguments to your tools.
To prevent your backend services from crashing when an LLM sends corrupted inputs:
- Leverage Type Hints & Libraries: If you are using
FastMCPin Python, leverage native type annotations. The framework automatically converts these into JSON Schema definitions for the LLM. - Validate Before Executing: If your tool expects an integer (e.g.,
user_id), verify its format and range before initiating database queries. Returning a clear, structured error message over the MCP channel is always better than letting a database connection throw an unhandled exception. - Format Errors for the Model: Instead of crashing, catch exceptions and return them as standard text responses within the
CallToolResultobject. Inform the model why the tool failed (e.g.,"Error: User ID 404 not found. Please verify the ID and try again."). This allows the LLM to self-correct and attempt the call again with corrected arguments.
Enterprise Scaling: Multilingual Support and Multi-Model Routing
As your MCP infrastructure matures, you may find the need to route tool calls across multiple proprietary LLMs or translate incoming payloads for multilingual applications. Designing a modular architecture ensures that your tools remain model-agnostic.
For complex, production-grade workflows, combining your custom MCP servers with dedicated voice and LLM infrastructure can unlock massive efficiency gains. Platforms like CallMissed enable you to connect your custom workflows and databases directly to over 300+ LLMs through a unified inference API. If you are deploying conversational AI, CallMissed also offers Speech-to-Text capabilities across 22 regional Indian languages, allowing you to build multilingual, voice-enabled AI agents that leverage the exact same underlying MCP tools you've already built.
Managing State and Security Best Practices
Because MCP tools are frequently triggered dynamically by autonomous agents, enforcing the principle of least privilege is paramount to securing your system.
- Stateless by Design: Keep your MCP servers as stateless as possible. If a tool requires authentication, avoid storing session states or credentials in global variables on the server. Instead, pass short-lived session tokens as part of the tool's arguments or use environment variables loaded securely at startup.
- Read-Only Safeguards: If an MCP tool only needs to retrieve data, configure its database connection string with read-only permissions. This mitigates the risk of an LLM finding a prompt-injection vector that attempts to delete or alter database records.
- Strict Sandboxing: When building tools that interact with the local filesystem (such as reading logs or writing files), strictly validate file paths to prevent directory traversal attacks (e.g., ensuring paths cannot contain
../sequences). Always resolve file paths relative to a designated, sandboxed directory.
Common Mistakes to Avoid (TABLE)
Building your first Model Context Protocol (MCP) server is an incredibly rewarding step toward giving large language models (LLMs) real-world capabilities. However, because MCP relies on JSON-RPC communication over standard input/output (stdio), debugging can be uniquely challenging compared to traditional REST or GraphQL APIs. A minor syntax error, an unhandled exception, or an accidental print statement can break the communication loop, leaving you with cryptic "Failed to connect" errors inside your host application (like Claude Desktop or Cursor).
To help you navigate these hurdles, we have compiled the most common pitfalls developers encounter when building and configuring their first MCP servers, along with the precise strategies required to fix them.
| Common Mistake | Direct Impact | Typical Root Cause | Recommended Solution |
|---|---|---|---|
| Stdout Pollution | Host fails to connect; JSON-RPC parsing errors. | Using raw print() or console.log() statements for debugging. | Redirect all logging to sys.stderr or use the built-in MCP logging context. |
| Relative Path Failures | "Server not found" or instant termination. | Using relative file paths inside the host configuration file. | Always define absolute paths for both your executable/python interpreter and files. |
| Missing Type Schemas | LLM ignores tools or passes malformed arguments. | Omiting Python type hints or failing to write descriptive docstrings. | Use strict Python type annotations (str, int) and write clear Pydantic models. |
| Skipping MCP Inspector | Blind debugging and sluggish development cycles. | Relying on the production LLM host UI to surface runtime errors. | Test the server locally in isolation using the @modelcontextprotocol/inspector tool. |
| Unrestricted Execution | Security vulnerabilities (RCE) on the host machine. | Exposing raw shell execution tools without strict validation. | Constrain tool inputs, sanitize strings, and apply read-only directory scopes. |
1. Polluting Standard Output (stdout)
By default, the Model Context Protocol uses standard input (stdin) and standard output (stdout) to transmit structured JSON-RPC messages between the host (e.g., Claude Desktop) and the MCP server.
When you inject a traditional debug statement, such as print("Successfully connected to database") in Python or console.log("Fetching files...") in Node.js, those raw text strings are injected directly into the stdout channel. Because the host application expects strict JSON-RPC structures, receiving raw, unformatted text breaks the parser. This results in the host immediately closing the connection and throwing an unhelpful error.
The Fix:
If you need to log information for debugging purposes, redirect your output to standard error (stderr), which the host reads separately and often writes to a log file. In Python, you can configure your logger to output to stderr:
import logging
import sys

logging.basicConfig(level=logging.INFO, stream=sys.stderr)
logger = logging.getLogger("mcp_server")
logger.info("This is a safe debug log")
Alternatively, you can utilize the native MCP logging protocol, which allows your server to send formal log messages back to the host securely.
2. Path Resolution and Environment Mismatches in Host Configs
When you configure your host application (like Claude Desktop via its claude_desktop_config.json file), the host launches your MCP server as a background subprocess.
A common mistake is using relative paths to locate your server script or relying on your shell's default python or node aliases. Because the host runs in its own system environment, it may not inherit your shell's active virtual environment (venv or conda), your nvm node version, or your local path variables. If the host invokes a global system python interpreter that lacks the mcp or fastmcp libraries, your server will fail to start instantly.
The Fix:
Always specify absolute paths to both the runtime interpreter inside your virtual environment and the script file itself.
{
  "mcpServers": {
    "my-mcp-server": {
      "command": "/Users/username/projects/mcp-demo/.venv/bin/python",
      "args": [
        "/Users/username/projects/mcp-demo/server.py"
      ]
    }
  }
}
If you are using package managers like uv or npx, you can leverage them to handle environment execution cleanly:
{
  "mcpServers": {
    "my-mcp-server": {
      "command": "uv",
      "args": [
        "run",
        "--directory",
        "/Users/username/projects/mcp-demo",
        "python",
        "server.py"
      ]
    }
  }
}
3. Vague Tool Schemas and Missing Type Hints
LLMs do not magically guess how to use the tools your MCP server exposes. They rely on the JSON schema generated by your server code. If you use Python's FastMCP or the TypeScript SDK, the framework automatically generates these schemas using your function signatures, type hints, and docstrings.
If you write a function like:
# Bad Example
@app.tool()
def get_user_data(user_id):
    # fetches data
The generated schema will lack parameter types and descriptions, leaving the LLM completely blind as to what user_id should look like. This leads to the LLM hallucinating arguments or failing to invoke the tool altogether.
The Fix:
Be incredibly explicit. Use robust type annotations and write highly detailed docstrings that explain exactly what the tool does and what each parameter represents.
# Good Example
@app.tool()
def get_user_data(user_id: int) -> str:
    """
    Fetches the profile details, active subscription, and email for a specific user.

    Args:
        user_id (int): The unique 6-digit database identifier of the customer.
    """
4. Overlooking Local Debugging with the MCP Inspector
Attempting to debug your code by repeatedly saving, opening your host application, testing a prompt, and hunting down application logs is incredibly slow. When a tool crashes, the host interface rarely displays the raw stack trace, leaving you guessing where the bug resides.
The Fix:
The MCP ecosystem includes a dedicated local debugging tool called the Model Context Protocol Inspector. It provides an interactive web-based interface where you can spin up your server, view active tools, run queries, and inspect raw JSON-RPC traffic.
To run the inspector on a Python server, use:
npx @modelcontextprotocol/inspector uv run server.pyThis isolates your server from the host application, allowing you to catch syntax errors, missing packages, and logic bugs in seconds.
5. Transitioning Local MCPs directly to Production
As you successfully build and test your local MCP server, you might feel tempted to roll it out to external users or link it with complex customer-facing workflows. However, local stdio-based servers are not designed to handle highly concurrent API calls, secure multi-tenant data access, or interface natively with communication channels like phones or text messaging systems.
For developers seeking to scale these capabilities beyond a local desktop environment, specialized platforms offer a much smoother path. For instance, CallMissed provides a robust, production-grade AI communication infrastructure that lets developers seamlessly link LLMs with tools and APIs.
Instead of manually scaling local subprocesses, you can connect your business logic to platforms like CallMissed, which handle multi-model LLM routing (supporting over 300+ models), built-in Speech-to-Text in 22 regional Indian languages, and production-ready voice agent deployment. This bridge ensures that the tools you build don't just run on your local terminal, but can actively participate in automated, real-time voice calls and chatbot conversations globally.
Frequently Asked Questions
What are the core system prerequisites and tools needed for building your first MCP server?
pip, uv, or npm. Additionally, you must install an MCP-compliant host application, such as Claude Desktop, Cursor, or a specialized developer tool, to initiate protocol connections and render the interactive agent UI. Finally, installing the official @modelcontextprotocol/inspector utility via npm is highly recommended, as this command-line tool allows you to run, test, and debug your server's exposed tools, prompts, and resources in an isolated local web interface before integrating them into production environments.Can I use Python and FastMCP to build your first MCP server, and what are its advantages?
@mcp.tool() and @mcp.resource() to automatically generate the complex JSON-RPC schemas required by the Model Context Protocol, removing the need for tedious manual schema configuration. Furthermore, because FastMCP natively integrates with asynchronous Python runtimes (like asyncio) and data validation libraries like Pydantic, you can rapidly build high-performance servers that safely validate inputs, query external SQL databases, and fetch live web APIs with minimal code.How do I test and debug my custom implementation when building your first MCP server?
npx @modelcontextprotocol/inspector), which boots up your local server and launches a web browser interface where you can manually trigger tools and inspect raw JSON-RPC traffic. If you prefer testing in a real-world scenario, you can configure your server path, command arguments, and environment variables within your host's local configuration file, such as claude_desktop_config.json on macOS or Windows. Crucially, you must avoid using raw print() statements for debugging within your code because the protocol relies strictly on standard input/output (stdin/stdout) for protocol messaging; instead, route all debug logs to standard error (stderr) or use the framework's built-in logging utilities.What is the exact difference between host, client, and server in the Model Context Protocol?
Can an MCP server handle real-time database connections and external API integrations?
What are the security best practices I must follow when deploying an MCP server?
Resources & Next Steps
Congratulations on building and running your very first Model Context Protocol (MCP) server! By establishing this standardized bridge between Large Language Models (LLMs) and local or remote data sources, you have unlocked a new paradigm of agentic capability. Instead of treating AI as a closed-box system limited to its training data, you have empowered it to interact dynamically with databases, APIs, file systems, and custom workflows.
To help you transition from a local development environment to a production-grade infrastructure, this final section compiles the most critical learning resources, advanced architectural paths, and deployment strategies you will need next.
Official & Community Resources
As the MCP ecosystem expands rapidly, staying updated with the official standards and community contributions is vital. Below are the primary learning hubs, developer repositories, and packages you should bookmark:
- The Official MCP Specification: The absolute source of truth for the Model Context Protocol. Refer to the official specifications to understand the underlying JSON-RPC 2.0 schemas, lifecycles, and capabilities (Resources, Prompts, and Tools).
- FastMCP (Python): Highlighted by developers across platforms like freeCodeCamp, FastMCP is a high-level framework built on top of the official Python SDK. It minimizes boilerplate code, allowing you to define tools, resources, and prompts using simple Python decorators (such as
@app.tool()). - Microsoft's MCP for Beginners: Microsoft’s open-source
mcp-for-beginnersGitHub repository is an exceptional practical guide for setting up structured environments and exploring pre-built server templates. - The GitHub MCP Server Registry: A community-curated collection of open-source MCP servers. Before building a custom integration from scratch, check this repository to see if a community-maintained server already exists for popular tools like PostgreSQL, GitHub, Slack, Jira, or Google Drive.
Advanced Development Paradigms
Now that you understand basic server setup, dependency installation, and local testing, you can begin extending your server's functionality into more complex domains:
- Transitioning from
stdioto SSE Transports:
Most beginner tutorials focus on standard input/output (stdio) transport, which is perfect for local host environments like Cursor or Claude Desktop running on the same machine. However, for remote services, cloud deployments, and multi-user environments, you must transition to Server-Sent Events (SSE). SSE enables your MCP server to communicate over HTTP, opening up webhooks and remote API integrations.
- Securing Your MCP Server:
When exposing internal tools and data to an LLM, security is paramount. Implement strict token-based authentication (such as Bearer tokens), restrict server network access to specific IP whitelists, and enforce strict input validation on all tool parameters using libraries like Pydantic (Python) or Zod (TypeScript) to prevent prompt injection attacks from executing malicious payloads.
- Deep-Dive Debugging with MCP Inspector:
The MCP Inspector is an indispensable, interactive developer tool designed to run and dry-test your servers independently of any client UI. It allows you to manually call tools, inspect the resources exposed by your server, analyze JSON-RPC traffic, and view raw logs to pinpoint issues before deploying.
- Handling State and Session Memory:
Advanced MCP servers must maintain state across tool calls. Explore how to implement database persistence, Redis-backed session stores, or vector memory layers so your custom tools can recall past executions and provide contextual coherence over long conversations.
Scaling Context in Production with CallMissed
Building a robust MCP server is only half the battle; the real value comes from deploying these tools to real-world communication channels. This is where advanced infrastructure platforms like CallMissed become invaluable.
While typical MCP clients are desktop environments like Claude Desktop or Cursor, modern businesses require these agentic capabilities on live, customer-facing interfaces. CallMissed’s AI communication platform acts as an enterprise-grade bridge, allowing you to connect your custom MCP tools directly to scalable customer channels.
For instance, you can leverage CallMissed's multi-model LLM inference gateway—which provides seamless access to over 300+ advanced models—to dynamically run your MCP servers behind voice agents and WhatsApp chatbots. By deploying your MCP server over an SSE transport, a CallMissed AI voice agent utilizing Speech-to-Text (supporting 22 Indian languages natively) can answer a user's phone call, query your custom MCP server to check inventory or book an appointment, and speak the results back to the caller in real-time. This turns a simple local developer project into a globally accessible, multilingual customer support automation system.
Your Post-Tutorial Checklist
As you move forward, use this actionable checklist to structure your next development cycle:
- [ ] Refactor with FastMCP: If you built your first server using raw SDK configurations, rewrite it using FastMCP to make your codebase cleaner, highly modular, and easier to scale.
- [ ] Implement Comprehensive Logging: Ensure all JSON-RPC requests, tool executions, and external API calls are properly logged using structured logging frameworks (e.g., Python's
loggingmodule or JavaScript'swinston). - [ ] Containerize with Docker: Package your MCP server, its environment variables, and its dependencies into a lightweight Docker container to ensure consistent behavior across local testing and cloud staging environments.
- [ ] Connect to a Host Client: Configure your server inside an everyday developer tool like Cursor or Claude Desktop to experience firsthand how the LLM decides to trigger your tools during natural conversations.
- [ ] Expose Over SSE: Write an HTTP wrapper around your server to support SSE, preparing your infrastructure for integration with production platforms and conversational voice systems.
Conclusion
The Model Context Protocol (MCP) is rapidly shifting from an exciting developer trend into a foundational standard for the agentic web. By building your first server, you have taken a critical step toward creating LLMs that do not just chat, but actively "think" and interact with the real-world data and APIs around them.
As you continue developing, keep these core principles in mind:
- Decoupled Context: MCP separates the reasoning host from the data source, ensuring robust security, modularity, and control over what models can access.
- Developer-Friendly Tooling: Frameworks like FastMCP make it easier than ever to build, test, and deploy customized servers in just a few lines of Python or TypeScript.
- Agentic Capabilities: Connecting custom tools to LLMs elevates static models into active assistants capable of managing HR workflows, local databases, or external APIs.
Looking ahead, we can expect MCP to become natively integrated across more enterprise systems, unifying how local agents and cloud-based LLMs exchange structured information. This standardization will pave the way for highly context-aware, autonomous AI workflows that run seamlessly across different platforms.
To explore how AI communication is evolving, check out CallMissed — an AI infrastructure platform powering voice agents and multilingual chatbots for businesses. By leveraging advanced tooling and multi-model APIs today, you can position your architecture for this agent-first future.
How will you use MCP to bridge the gap between your proprietary data and LLMs? What custom server will you build next to supercharge your workflow?
Related Posts


Ready to automate customer conversations?
Launch AI voice agents and WhatsApp bots with CallMissed — one API, 22+ Indian languages.